If you recently built your own mailbox but are left wondering how to anchor the post, don’t worry it’s easy. You can install your mailbox post in a couple ways. The strongest and easiest way is cementing it in. You can also dig your hole deep enough to where you don’t need cement
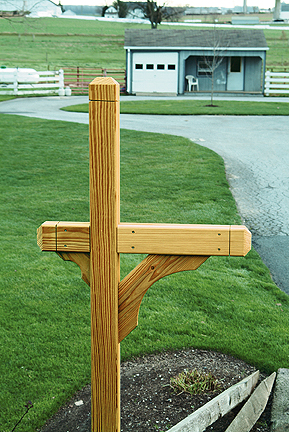
For this guide we’ll be using concrete to anchor in the post as it’s the longest lasting method. Before you start head to your local host office and pick up the specifications for how you have to mount the box. Typically mailboxes are 42” from street level to the bottom of the box. They should also be 6-8” back from the front face of the curb. Failure to follow USPS specifications may result in undelivered mail.
Installation
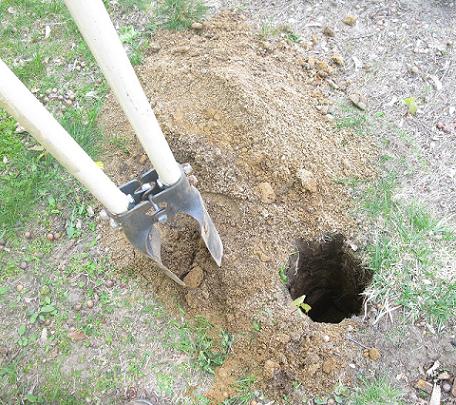
Start by marking the spot with an X that you want to dig. Next use a shovel to pick out a chunk of sod so you can patch the hole when you’re done. Next use a post hole digger to dig a 9” hole all around and 20” deep. Pour approximately 6” of gravel into your hole to help with drainage.
The next step is to place the pole into the hole. Double check your box is 41-46” off the ground, and 6-8” from the curb before continuing. If it’s too high or low, add or remove gravel to get the correct height.
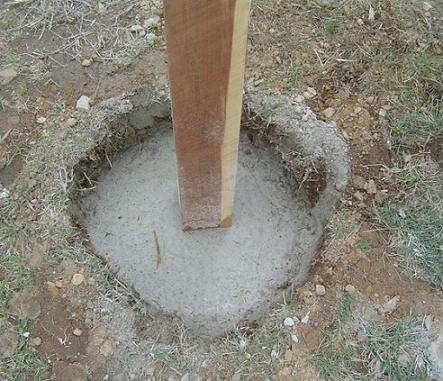
Use either wooden braces or a helpful hand to hold the pole straight up in the hole. Use a level to make sure it’s perfectly even. Pour the concrete mix into the hole until it’s a few inches from the top of the hole. Add water to the concrete mix that’s in the hole in accordance to the instructions on the bag.
After about 30 minutes of drying time, it’s time to fill in the rest of the hole. Use the leftover dirt from the hole you dug to fill in the hole. Replace the top layer of sod if you successfully extracted it in step one.